Archive for the ‘How To’ Category

April 16th, 2008  Posted at   Blog, How To, Make Money Online, Technology

Just after I upgraded, I immediately go to the admin page for my blog. The interface looks great! I like the light blue. Oh, I just like it!

Then, I go to write a new post and test out the multiple photos upload. Problem comes!! 🙁 I got the “HTTP error. An error occurred in the upload. Please try again later” while uploading the photo. I tried a few times and it was still the same.


* The screen capture is taken from hongkiat.com.

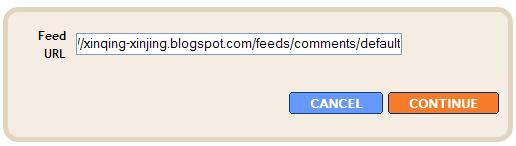
Then I search this problem in Google, I’m sure there will be solution. I was right! I found the solution from Hong Kiat’s Blog. We need to go to the public_html in the file manager in cpanel. There is a file called .htaccess. Edit and paste the following command into the file.

<IfModule mod_security.c>
<Files async-upload.php>
SecFilterEngine Off
SecFilterScanPOST Off
</Files>
</IfModule>

After the editing, save it. Problem solved! For more detail on this solution, please read it from hongkiat.com

After successfully uploading the photo, I try to upgrade WordPress 2.5 into my another blog. I do the same steps and this time, I got another error on the photo uploading: Specified file failed upload test.

Again, I Google it. It seems like we need to do some editing on 2 files:

wp-admin/includes/media.php, look for line 817, DELETE the coma (,).

814 file_queue_error_handler : fileQueueError,
815 file_dialog_complete_handler : fileDialogComplete,
816
817 debug: false,
debug: false
818 });
819 $(“#flash-browse-button”).bind( “click”, function(){swfu.selectFiles();});
820 });

wp-includes/js/swfupload/handlers.js, look for line 99, the coma (,).

96 jQuery(‘#media-item-‘ + this.id + ‘ .filename’).append(‘ ‘+swfuploadL10n.deleted+’‘).siblings(‘a.toggle’).remove();
97 jQuery(‘#media-item-‘ + this.id).children(‘.describe’).css({backgroundColor:’#fff’}).end()
98 .animate({backgroundColor:’#ffc0c0′}, {queue:false,duration:50})
99 .animate({minHeight:0,height:36,}, 400, null, function(){jQuery(this).children(‘.describe’).remove()})
.animate({minHeight:0,height:36}, 400, null, function(){jQuery(this).children(‘.describe’).remove()})
100 .animate({backgroundColor:’#fff’}, 400)
101 .animate({height:0}, 800, null, function(){jQuery(this).remove();updateMediaForm();});

For my case, I only need to delete the coma (,) in wp-includes/js/swfupload/handlers.js and the issue fixed!

Upgrade to WordPress 2.5 and experience the new features now!

April 15th, 2008  Posted at   Blog, How To, Technology

I upgraded my blog to WordPress 2.5 this morning. It has been there for some time but I didn’t do the change. Before I did the upgrade, I read about the new feature in version 2.5.

2 features that make me want to upgrade to WordPress 2.5 are: multiple photos can be uploaded at one time and the dashboard interface will be different. The multiple upload is the best change in this latest version. I no longer need to upload my photo one by one. It can save my time.

How to upgrade? Just go to the cpanel for your blog. Click on the Fantastico De Luxe under the Software/Service section. You will find your blog’s name on the left and there is a upgrade to 2.5 link for you to click. After clicking on that, it will ask you to confirm before the upgrading. Once you click, your blog will upgraded to use WordPress 2.5 in few seconds. The upgrade is fast!

Some screen shot from WordPress 2.5.

Now, you are ready to use WordPress 2.5! 🙂

December 18th, 2007  Posted at   Blog, How To
   |   14 Comments

I didn’t expect to have Part 2 on this topic. But somehow CS commented that we can actually do it in blogspot itself. I never tried. Since he said it’s working and I actually see it from his blog, I share it to all of you (Just in case you didn’t read his comment).

Steps:

1. Go to the Page Element in blogspot. (I hope you know how to go to page element, if don’t know, knock your head on the wall. Hahahaha, just kidding.) It’s under Template > Page Element.

comments2.JPG

2. Add a Page Element. Choose Feed and click Add to Blog.

comments3.JPG

3. Enter the URL as below: http://xxx.blogspot.com/feeds/comments/default. For example, http://xinqing-xinjing.blogspot.com/feeds/comments/default. Click Continue.

comments4.JPG

4. You can edit the title and select the option you want. Only maximum of 5 comments can be displayed. You can preview on the option you have selected.

comments5.JPG

Besides comments, if you want to view your recent post, you can follow the same steps but when enter the URL, change the comments to posts, like this:
http://xinqing-xinjing.blogspot.com/feeds/posts/default.
Understand? I think this one is not so useful since we already have Blog Archive.

So, which one you prefer? The Widget or the Feed?

For me, I prefer the Widget. Besides author, date and comment, I also can know which post is actually readers left the comments on.

* Thanks CS for the sharing on another way of adding recent comments into blogspot.

December 17th, 2007  Posted at   Blog, How To
   |   469 Comments

I’m going to stop my Singapore trip post for today. I still have quite a number to post but I decided to write something else other than Singapore Singapore Singapore non stop. Si peh boring right? (Si peh is like Damn in English. It’s Hokkien. Just in case you don’t know what it means.)

I’m having a difficult time to find out who left comments in my blogspot blog especially on old post. It’s impossible for me to view all my posts everyday just to find out who has left the comment. Luckily, there is a widget called Recent Comments that solve my problem. It can show all the recent comments your reader left. Cool huh? (FYI, other blog hosting like WordPress has this feature embedded into it.)

Today, when I browse through Hoon’s blog, I found she has this feature on the side bar. There is a link below the recent comment column that says “Add this widget to your blog“. Without any hesitation, I clicked on it. It came out this page.

widget1.JPG

How it works?

Just fill in your blog URL into the Blog Address column. Before clicking Apply, you can choose how many comments you want it to display, whether to show comment date and post title and how many character for the summary size. After clicking the Apply, continue to click Add widget to my blog. The below page will appear.

widget2.JPG

Just select the blog you want to add this widget into. Normally only one blog is showing unless you have a couple of blogspot blogs. Edit the title as you wish. Click ADD WIDGET and it’s all done. You can see the Recent Comments appear under Page Element page.

widget3.JPG

The outcome will be as below:

widget4.JPG

It’s so easy, right? Now you will no longer miss any comments even though your reader left a comment in your very very old post.

p/s Hoon, I help you to “pak kong kor” (advertise) your bog, I want my commission ya…… 😀

December 2nd, 2007  Posted at   Blog, How To
   |   No Comments

(continue from the previous post)

For own domain, first thing you need to do is buying a domain (Of coz laa….. if not buy what?). You can get lots of sites for buying a domain, if you search through google: MadDogDomains.com, Register.com, buydomains.com, active-domain.com and many many more. For me, I use Godaddy. Once you got the domain name, you need to have a web hosting server. Again, there are a lot. If you cannot decide which one to use, you can go to Hosting–Review.com, Top-10-Web-Hosting.com or webhostingbluebook.com to check them out. Before you can start to blog, you need to do some configuration. the setting is depends on which web hosting your are choosing. Normally, the web hosting site will provide support for the users. You can contact the customer support to help you out.

From what I noticed, most of the people feel excited when they see their friends have a blog. They also want to have one. This is very common. They are like small kids, when see something new, they want to try out. So, they started theirs. At first, they are writing everyday. Slowly, the post become less. Sooner or later, they feel bored and stop writing.

My recommendation: Beginners can start with a free blog hosting. It’s easier. Not much setting need to be done. If you want to stop anytime, just stop, no need to pay any single cent.

What do you think about blog? Any comments?

December 1st, 2007  Posted at   Blog, How To
   |   No Comments

Before I start, let me talk about what is a blog. To me, a blog is some thing like your own diary or a platform that can let you write almost anything you want.

From Wikipedia:
A blog (a portmanteau of web log) is a website where entries are written in chronological order and commonly displayed in reverse chronological order. “Blog” can also be used as a verb, meaning to maintain or add content to a blog.

Many blogs provide commentary or news on a particular subject; others function as more personal online diaries. A typical blog combines text, images, and links to other blogs, web pages, and other media related to its topic. The ability for readers to leave comments in an interactive format is an important part of many blogs. Most blogs are primarily textual, although some focus on art (artlog), photographs (photoblog), sketchblog, videos (vlog), music (MP3 blog), audio (podcasting) and are part of a wider network of social media. Micro-blogging is another type of blogging which consists of blogs with very short posts.

I started my blog in 2005 after get influenced by my brother. I have posted my blog history before, so I’m not going to repeat here (You can click HERE to read about it). The main topic I want to share is, How to Blog.

There are 2 options for you to start your blog: Register to a free blog hosting OR register your own domain and web hosting server.

Register to a free blog hosting is the easiest way ever. They are so many free blog hosting out there. The most common will be the blogger.com. Besides blogspot, wordpress, myspace, xanga, typepad, livejournal, vox and etc are also available online. This is base on personal preference.

Free blog hosting embed most of the stuff inside, you can start to write in just seconds. It’s pretty straight forward. Just go and register an account, login and start yout posting. Of coz, you can change the template as you wish. You also can attach additional stuff into you blog like videos and photos, with just a simple click. For the intermmediate level, you even can edit the coding inside.

For the 2nd option, post it tomorrow. Too lengthy………

(to be continue…)